How to Replace iPhone 11 Screen? Step-by-Step Guide
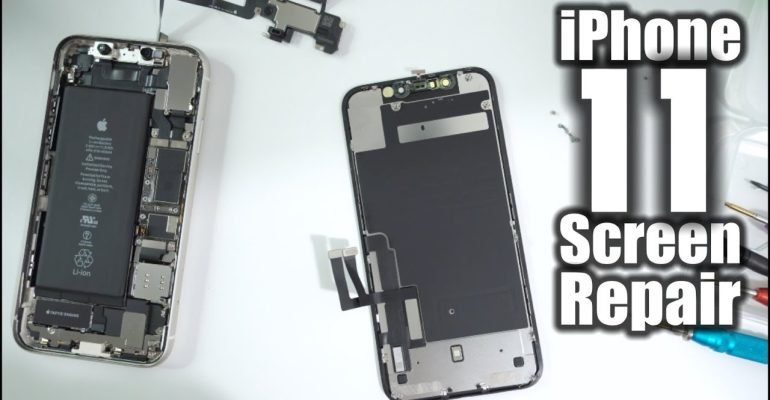

Accidents happen. Sometimes, your iPhone 11 screen gets cracked. Replacing the screen can be expensive. But you can do it yourself! This guide will help you replace the iPhone 11 screen step-by-step. Let’s get started!
What You Will Need
Before you start, make sure you have all the necessary tools. Here is a list:
- Replacement screen
- Pentalobe screwdriver
- Phillips screwdriver
- Suction cup
- Plastic opening tools
- Tweezers
- Spudger
- Heat gun (or hair dryer)
- Adhesive strips

Credit: www.amazon.com
Step-by-Step Guide
Step 1: Power Off Your Iphone 11
First, you need to turn off your iPhone. Hold the side button and either volume button. Slide to power off.
Step 2: Remove The Pentalobe Screws
Use the pentalobe screwdriver to remove the two screws near the charging port. Keep these screws safe. You will need them later.
Step 3: Heat The Edges Of The Screen
Use a heat gun or hair dryer to warm the edges of the screen. This helps to soften the adhesive. Be careful not to overheat!
Step 4: Use The Suction Cup
Place the suction cup near the bottom edge of the screen. Pull up gently to create a gap.
Step 5: Insert Plastic Opening Tool
Insert the plastic opening tool into the gap. Slide it around the edges to loosen the adhesive.
Step 6: Lift The Screen
Carefully lift the screen from the frame. Do this slowly to avoid damaging the cables inside.
Step 7: Disconnect The Battery
Use the Phillips screwdriver to remove the screws holding the metal shield. This shield covers the battery connector. Use the spudger to disconnect the battery.
Step 8: Disconnect The Screen Cables
There are three cables to disconnect: the digitizer, LCD, and front camera cables. Use the spudger to gently disconnect them.
Step 9: Remove The Old Screen
Now you can fully remove the old screen. Be careful with the cables and components.
Step 10: Transfer Components To The New Screen
Some components need to be transferred from the old screen to the new one. This includes the front camera and earpiece. Use the Phillips screwdriver to remove these parts and reattach them to the new screen.
Step 11: Connect The New Screen
Connect the new screen’s cables to the iPhone. Reattach the digitizer, LCD, and front camera cables.
Step 12: Reconnect The Battery
Reconnect the battery connector. Place the metal shield back and secure it with screws.
Step 13: Secure The Screen
Carefully align the new screen with the frame. Press down gently to secure it in place.
Step 14: Replace The Pentalobe Screws
Finally, replace the two pentalobe screws near the charging port. This secures the screen to the iPhone.
Tips and Warnings
- Work on a clean, flat surface. This helps keep small parts safe.
- Be gentle. iPhone components are fragile.
- Keep track of all screws and parts. Losing them can cause problems.
- If you feel unsure, seek professional help. It’s better than causing more damage.

Credit: www.ifixit.com
Frequently Asked Questions
How Do I Start Replacing My Iphone 11 Screen?
First, power off your iPhone 11 completely.
What Tools Are Needed For Screen Replacement?
You need a pentalobe screwdriver, suction cup, spudger, and replacement screen.
Can I Replace My Iphone 11 Screen At Home?
Yes, with the right tools and instructions, it’s possible.
How Long Does It Take To Replace The Screen?
It typically takes about 30-60 minutes.
Conclusion
Replacing an iPhone 11 screen can seem hard. But with this guide, you can do it yourself. You’ll save money and learn something new. Always be careful and take your time. Good luck with your repair!